System diagramming: Difference between revisions
Mr. MacKenty (talk | contribs) |
Mr. MacKenty (talk | contribs) No edit summary |
||
| Line 23: | Line 23: | ||
<br /> | <br /> | ||
[[File:Flowchart 1.png]] | [[File:Flowchart 1.png]] | ||
== Example 2 == | |||
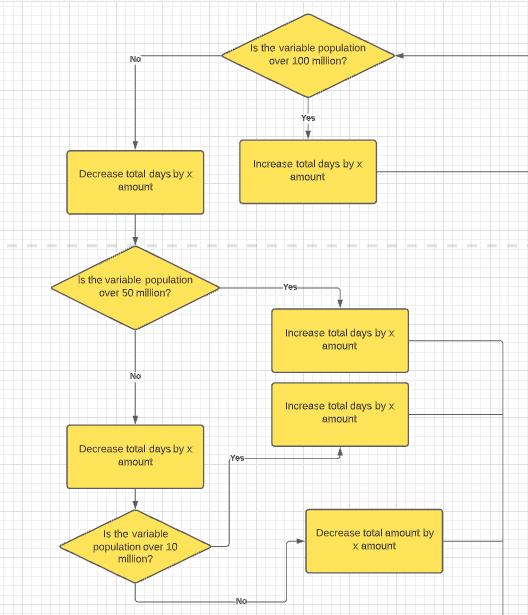
This flowchart is part of a larger flowchart. Without much effort, we could convert this flowchart into [[pseudocode]] or actual code. This flowchart is a suitable level of detail. Thank you to my student Ofir for creating this. | |||
<br /> | |||
[[File:Flowchart 2.png]] | |||
== References == | == References == | ||
Latest revision as of 12:01, 21 April 2021

A system diagram is a visual model of a system, its components, and their interactions. With supporting documentation, it can capture all the essential information of a system's design. There are many variations of diagramming style.[2]
Diagrams, if properly constructed, are excellent mechanisms to communicate complex information to others, much like a well-made technical drawing. Designing is, among other things, an act of communication, so making sure one has an accurate and relatively easy to read account of design decisions is important for communicating that information to others.[3]
System flow charts[edit]
Creating good system flow charts is a learned skill. You will need to practice. You will also need to create flow charts so they can be critiqued by a teacher.
In general:
- flowcharts must be of sufficient detail so another person can accurately describe how your program will work using only a flow chart
- flowcharts must not be cluttered. It is better to make 2 or 3 clear flowcharts rather than one visually cluttered one
- flowcharts should be transferrable to pseudocode
common mistakes[edit]
- students generally do not use conditional symbol correctly.
- A conditional symbol must have a yes/no true/false question with clear lines leading from the conditional
- students do not have a suitable level of detail
Example 1[edit]
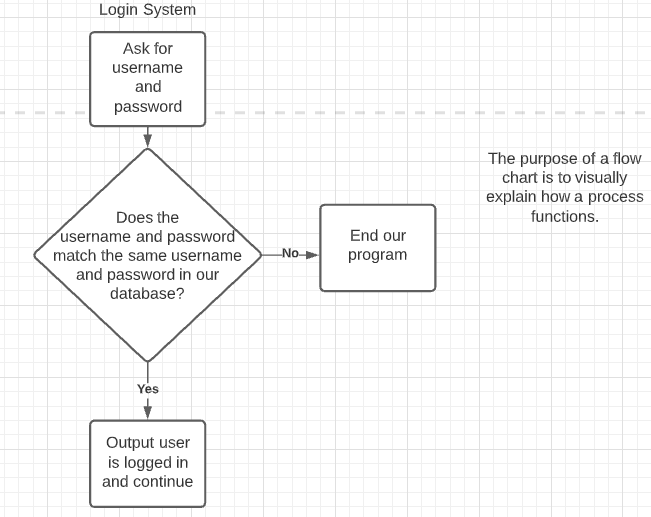
This flowchart is a good for a very broad overview, but it lacks detail to explain how the program actually works. EACH BLOCK in this flowchart could (and should) be a separate flowchart.

Example 2[edit]
This flowchart is part of a larger flowchart. Without much effort, we could convert this flowchart into pseudocode or actual code. This flowchart is a suitable level of detail. Thank you to my student Ofir for creating this.
